Nakoľko mám aj pracovné povinnosti, prešli sme na systém schôdzok raz za dva týždne po dve vyučovacie hodiny. Napriek prísľubu, priestory v škole boli opäť iba učebňou bez možnosti akýchkoľvek mechanických prác. Preto som sa rozhodol, že postavíme jeden prijímač, ale tak, aby chlapci pochopili vznik konštrukcie a aj sami si porobili aspoň niektoré mechanické práce.


Zvolil som zapojenie spätnoväzobného audiónu s integrovaným NF zosilňovačom. Vďaka Braňovi sme mali vyrobené dosky plošných spojov a časť súčiastok. Ja som pripravil mechanické diely, teda nastrihal a ohnul plechy na šasi. Postupne si chlapci vŕtali dosky plošných spojov a diery do šasi. Keďže nevlastním požičovňu náradia, práce išli pomerne pomaly a to bol aj hlavný dôvod, prečo vydržali iba tí najtrpezlivejší.
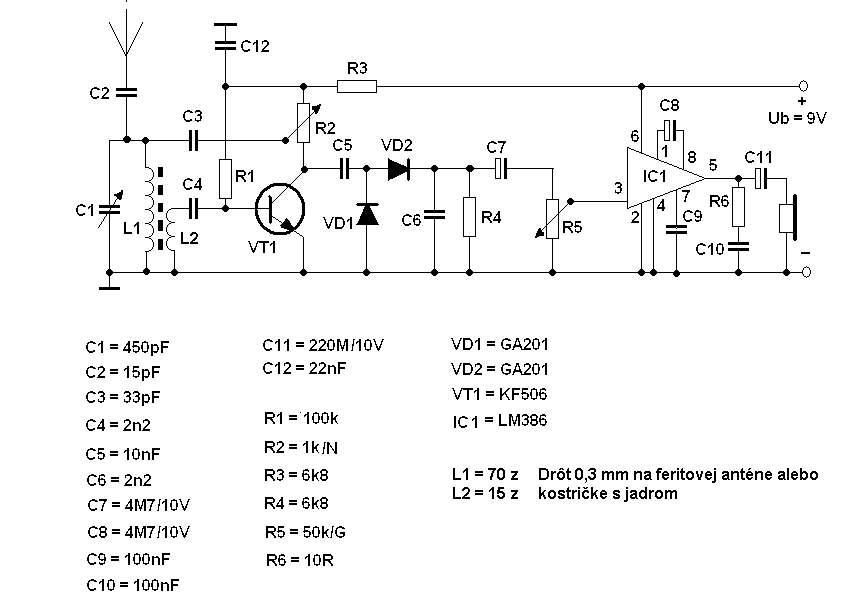
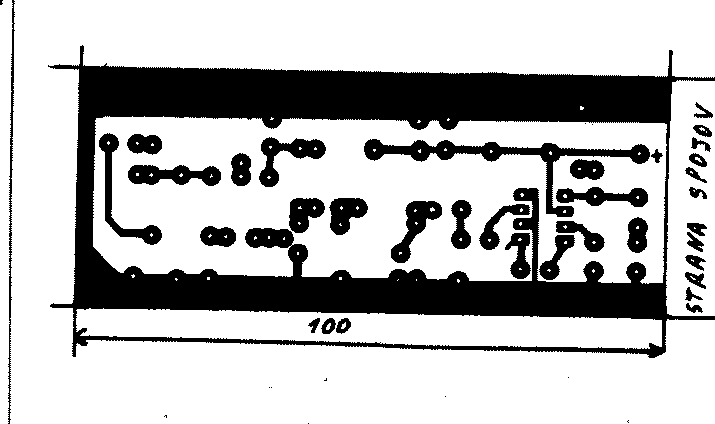
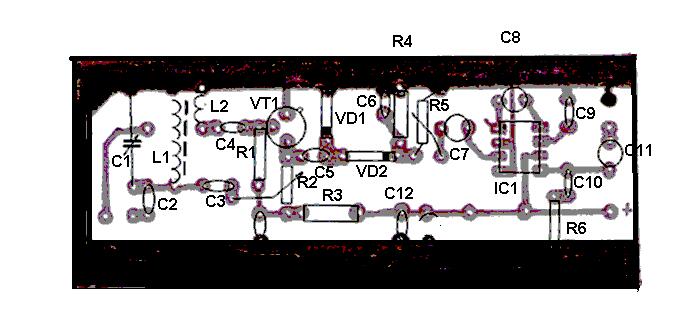
Celkovo sme na záver krúžku dokončili tri prijímače. Je to síce málo, ale aspoň traja chlapci ako – tak zvládli základy elektroniky. Prijímač bol navrhnutý pre stredné vlny, ale nič nebráni jeho použitiu aj na iných rozsahoch. Úplne najväčším problémom boli otočné kondenzátory, tie sme používali zo starých tranzistorových prijímačov systémom kto čo zohnal. Výsledok je možné vidieť na obrázkoch 1 a 2. Na obr. 3 je schéma prijímača aj s rozpisom použitých súčiastok a na obr. 4 a 5 je doska plošných spojov a osadzovací plánik.
Miro, OM3CKU
